Insect Specimen Preparation
When insects are removed after the relaxation period (36-48 hours), they should be pliable. At this time, their appendages can be more attractively or practically positioned—usually with temporarily placed insect pins. Rigormortis again sets in, but this time the insects are "frozen" so that their important identification characters are more discernible. 1 Shipment of live insects is beyond the scope of this publication (see section, "Miscellaneous Information").
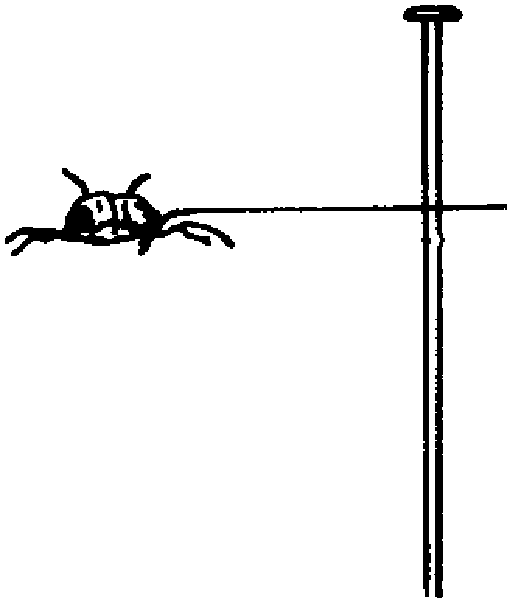
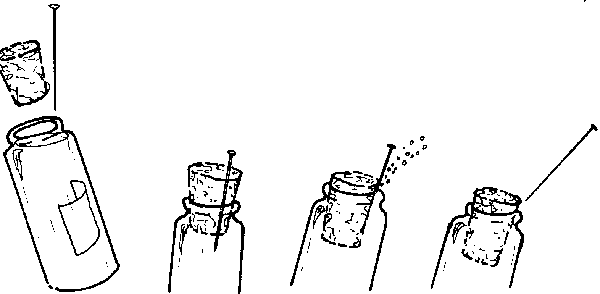
Small insects, such as bark beetles, cannot accommodate large pins. Therefore, they must be placed on "points," which in turn are pinned. Points are triangular, tiny pieces of rigid paper. They can be made with scissors, or more easily with a point maker. Point makers resemble hole punches and quickly punch out uniform-sized points (figure 3). To position bark beetle-sized insects on a point, the small end of the point is bent down and a tiny drop of glue is applied to the deflection. Then the insect is attached at its right side (figure 4).
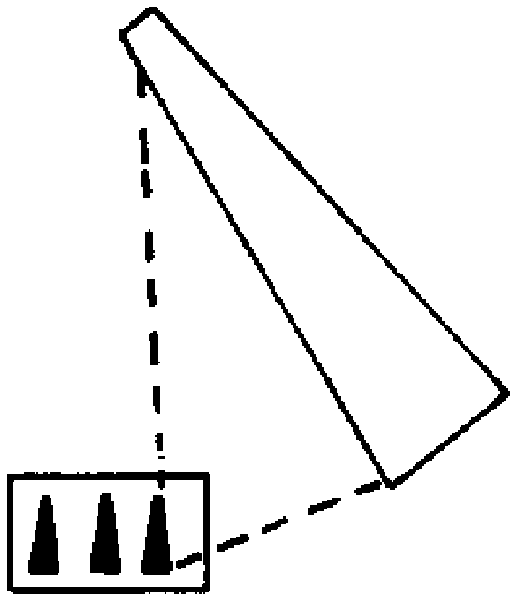
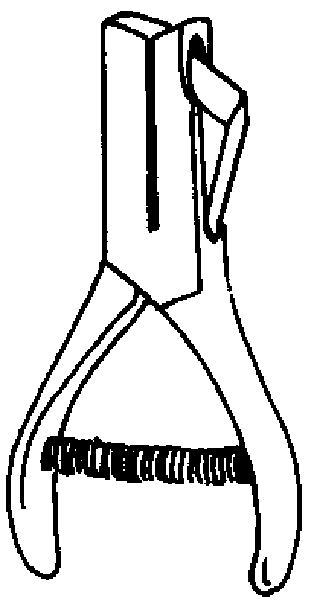
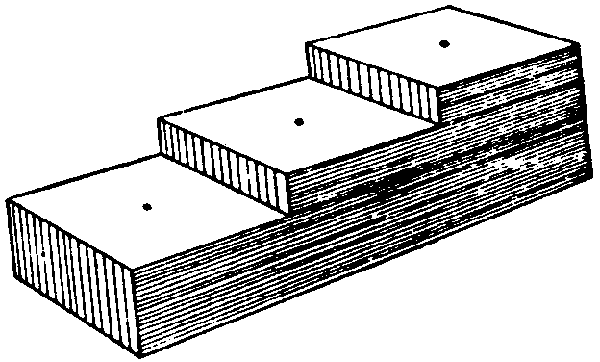
Mount insects on pins or points a height of 1 inch (2.5 cm) above the base of the mounting. This height can easily be determined with a pinning block (figure 5). Pinning blocks can be homemade or purchased from biological supply houses. Specimen height is simply equal to the maximum depth reached by the pin in the deepest of three holes. The function of holes 2 and 3 will be discussed under "labeling."
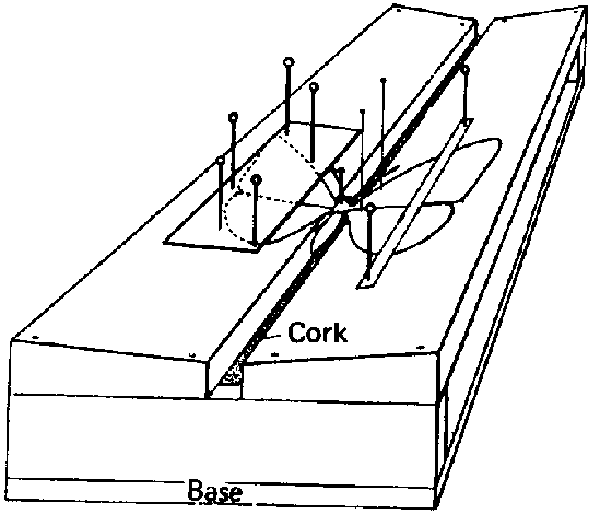
Because of their structure, moths require special treatment. While still pliable, or after relaxation, pin the moth directly through the middle of the thorax and position it in a spreading board (figure 6). Then pin paper strips over each set of wings parallel to the torso. Gently spread the wings with a needle so that they are fully extended. If a spreading board is not available, this same basic procedure can be used on a broad, flat surface, but position the insect upside down to avoid leg damage. When the abdomen feels firm to the touch, the specimen has sufficiently dried and can be labeled. Most immature insects should be preserved in alcohol. Make every effort to use ethyl alcohol. If ethyl is unavailable rubbing alcohol may be used for temporary preservation. Liquid preservation is obviously practical for such insects as month and sawfly larvae. Here too, forethought will help ensure proper preservation. Several liquid formulae are used to preserve specimens. A common, simple and functional mixture is 95 parts of 70-80 percent ethyl alcohol with five parts glycerine. Glycerine is easily obtainable from drugstores. Insects so preserved are usually kept in vials with solid rubber stoppers.
Because the body contents of a large specimen may dilute the preservative, it is best to replace the original alcohol with fresh alcohol after a day or two. As mentioned earlier, not all immature insects should be preserved in alcohol. Hard-bodied nyphs, for example (e.g., conebugs), should be pinned in the same manner as adults.
If the insect is pinned through its body, the location label is pinned through the center and pushed to level 2 (or ¾ inch) above the pinning block. With specimens on points, move the pin toward the beginning of the label to provide better balance of the insect and label. Level 3 of the pinning block is for the specimen identification label. It is not necessarily used by the submitters unless they request confirmation of an identification. Additional information such as host data or specimen number may also be place on label 3. With labeling, too proper care ensures functional, long lasting data. Print the letters in block style. Labels should be very small, but neat. They may be printed in either India ink or pencil (preferably India ink). Because the lettering is so small, many workers prefer to use rapidograph pens. Fountain pens aare impractical and fiber points are unacceptable. Labels for alcohol-preserved specimens are simply included loosely in the vial. The alcohol will not affect quality ink or lead penciling.
Line the box edges with cotton which has been securely glued or pinned. Its purpose is to catch any insect appendages which may become dislodged in transit, thus preventing further damage. Fit the lid firmly on the box. Ideally, it too is fitted with a Styrofoam inner top which fits securely over the knobs of the pins. The exterior should show instructions on how to remove the lid (e.g., "lift straight up" or "hinged here" followed by arrows). Under no circumstances send pinned and bottled specimens in the same container. Wrap each vial separately in cloth or paper towels. |
Forest Pests: Insects, Diseases & Other Damage Agents |

|
|